Hello me lovelies,
Its Gemma here, it's my turn for the Little Claire's weekly project which i have made card using a gorgeous little stamp set called Bright Blue Skies which you can buy from here
Here's the card we are going to make today...
Ingredients
Little Claire's Bright Blue Skies
Little Claire's 'Claire's sentiment' stamp set
Butterfly punch, Ribbon, Gems
14.7cm x 14.7cm square card {you can use a A5 card & cut down to 14.7cm}
12.5cm x 12.5cm square card
3 pieces of blue card...1st piece 14cm x 14cm, 2nd piece 12cm x 12cm. 3rd piece 14cm x 6.8cm
2 pieces of backing paper...1st piece 13.7cm x 13.7cm, 2nd piece 11.7cm x 11.7cm
2 large blue scalloped circles
2 large plain white circles
1 small blue scalloped circle
1 small white plain circle
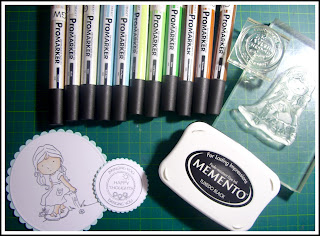
Promarkers...oatmeal, blush, ivory, grass, lime zest, leaf green, burnt sienna, cocoa, terracotta, duck egg, aqua
Instructions
1) Take your 14.7cm square card & cut a panel off the front of your card measuring 7.4cm width.
2) Take some ribbon and attach to the inside of your card, just like the picture, now wrap it around your card and adhere the ribbon to your card to keep the ribbon secure.
{don't worry where the ribbon is attached inside your card this will be covered}
3) Emboss your piece of 14cm x 6.8cm blue card, now matt & layer your largest piece of blue card & your largest piece of backing paper. Now stick both panels into your card.
4) Stamp your chosen image onto your large white circle & colour, i have chosen to colour my image with Promarkers. Now stamp your chosen sentiment onto your small white circle, now matt & layer both circles onto your blue scalloped circles.
{this is what your card will look like after step 6}
5) Take some ribbon and attach to the front of your 12.5cm square card about half way up the fold of your card.
6) Turn your card over so the back of your card is now your front of your card. Now matt &
layer your 12cm square blue card with your 11.7cm square backing paper, next you can
stick this to the front of your card. Wrap around your attached ribbon & secure with some adhesive.
7) Using foam pads you can now stick your image to the front of your 12.5cm square card along with your sentiment.
8) Now stick the smaller card onto the larger card like shown above.
9) Open the smaller card & tuck in the flap of your larger card inside, like shown.
10 ) I matt & layer the spare large blue scallope & plain white circle and stamp a sentiment that came with the Bright Blue Skies stamp set, i then placed this inside of the smaller card.
1
11) Now it's time to do the exciting bit which is to embellish as you wish!!
I hope you liked my tutorial & found it easy to follow…please do leave a comment
to let me know what you think, Thank you!!
For any ingredients you need to make this card please do visit Little Claire’s
because they have a fantastic range of products for you.
Challenges
Card Makin Mamas #50...1,2,3 recipe
Chocolate,Coffee & Cards #18...Rainbows & Butterflies
Challenges
Card Makin Mamas #50...1,2,3 recipe
Chocolate,Coffee & Cards #18...Rainbows & Butterflies
Hugs and xxx
Gemma


21 comments:
This is lovely Gemma and well done a really good tutorial
jacqui x
wow! Such a beautifully designed card Gemma, I love the image and the pretty papers. Thanks for a brilliant tutorial, I think I will be having a go with this design myself.
I hope you have a good weekend
Hugs Sue
Gemma, this is so sweet and pretty! Love those little butterflies on here too. Very pretty.
Lynn
Aww! Gem, this is so adorable. Love the fab tut hun.
Donna x
Who said blue and green should never be seen? Me likey, me likey alot. xx
Fabulous Gemma....:o)
big hugs Vicky xx
A beautiful card and a fab tutorial. I love the style and ribbon closure.
Nikki x
what a delightful card Gemma such pretty colours
hope you have a fabbie weekend
hugs
Hi Gemma, that's a really pretty card. Love the image, so sweet and your colours are just gorgeous.
Great tutorial as well, very clear - thank you.
Sarah
PS - Sorry to hear about the hacking of the X-box, there are some really nasty people out there. Hope you get your money back.
Gorgeous card Gemma, I like the sweet image, the soft colours and the butterflies.
Kevin xx
Oh that is soooo pretty Gemma!! Fabulous shape and love how you used the papers!
Lovely card Gemma, beautiful colours. Thanks for the tutorial x
so gorgeous gemma.stunning soft colours and i love the sweet image :D
fabulous tutorial too hun, thanks for sharing ;D
xx coops xx
Gorgeous card Gemma, love the sweet image and pretty colours.
Wendy xx
what a lovely and sweet card!
hugs and kisses from germany,
silvi xoxo
what a lovely and sweet card!
hugs and kisses from germany,
silvi xoxo
beautiful card lovely image great tut tracy x
Absolutely gorgeous, love the soft colours and fabulous design!
Helen x
what an absolutely darling card
stunning card Gemma fab colouring thanks for sharing with us at chocolate coffee and cards , good luck with the challenge Tracy xx
this is so pretty, thank you for joining our challenge at Chocolate, Coffee and Cards, hugs, martina
Post a Comment